

Making Your Own Natural Hair Butter
-
- May 14, 2015
While most of us come nowhere close to being kitchen mixtresses, almost all of us have at least tried our hand at whipping up some of our own hair products — namely whipped butters. They are so easy to make, and for the curly on a budget or one who does not have easy access to some of the well known natural brands out there, this is a great alternative. Making your own butter is so easy almost any curly can do it, so here’s an easy to follow guide to get you started.
Hair Butter Recipe
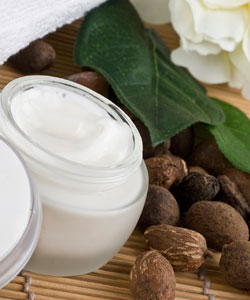
Begin with some butter of your choice, like shea, cocoa or mango, and your favorite hair oil. However, be careful where you purchase your butters and oils as you may not be getting the purest thing. Since it’s an all natural butter we want, be especially weary of commercial oils that are really laden with silicone and mineral oil with only a few drops of the actual oil. Also keep in mind what you want to use your butter for. If you want to create a hair butter, then mixing in heavy oils with an already heavy butter like shea may leave your strands weighed down and oily. Likewise, if you are trying to create a body butter, using light oils may not be heavy enough to keep your skin moisturized, especially in the winter months. Before even mixing, plan out what proportions of oil to butter you want to use keeping in mind that less liquid oil will make a firmer thicker butter and more oil will keep it fluffy and light.
- When heating your butters and oils, never place them directly into the pan as it may cause them to boil and burn. Instead, place about a cup and a half of water in a small pan and place a glass bowl over it then place your ingredients in the glass bowl. This is called a double boiler and is a much gentler way of heating up your oils and melting your butter.
- After the butter has melted, turn off your burner and remove the bowl from on top of the pan. Stir the mixture to ensure that all of the oils and butters are thoroughly combined and allow it to cool for a while. Don’t wait too long, however, since you do not want it to begin to harden before you start to whip it. Now is the time to add your essential and fragrance oils. Remember, you only need a few drops as these are concentrated oils.
- Once your ingredients are melted, mix until it’s nice and fluffy. It is much easier and faster to use a stand or electric hand mixer but if you don’t have one then a whisk will work just as well and tone your arms nicely. In order to make your butter nice and fluffy you will have to leave the mixer on or whisk continuously until it is no longer in the liquid form. If for some reason you stop the mixer or stop hand whisking for too long it could harden and not create the whipped mousse-like consistency that you want. Once your butter is whipped transfer it to a clean container with an air tight lid and store it in a cool dry place.
- Lastly, remember that oil and water do not mix. We may be tempted to add water based ingredients like aloe vera gel to our mixture, but the ingredients will not mix and you will be left with the butter at the bottom and liquid floating on top. In order for the liquids and oils to mix, emulsifiers must be used and unless you are a serious kitchen mixtress who has done her homework, you shouldn’t even attempt it. Also, adding any water based ingredient to your mix will drastically shorten its shelf life so let’s stick with the butters and oils.


